
Okay, so I finally got the spare time to write about the software setup to remote control the observatory. It all runs on my previously installed Astroberry on a Pi4 board. Astroberry comes together with all the required software and allows you to install your own if you wish. I did just that and went on to install VSpec for spectra analysis as well as Stellarium 0.18 which comes from the rasbian packages. But in this post, I will focus on setting up the key software required to remote control the mount (a Skywatcher EQ6-R in my case) and the additional devices like cameras (main and for autoguiding), autofocusers, filter wheels, etc.).
IMPORTANT: This post assumes that the mount is in place on the pier and that the telescope and other devices are connected.
Required astronomy software (it comes preinstalled with Astroberry):
- Kstars (planetarium to see the night sky and to direct the telescope to a particular celestial coordinate)
- Ekos (automation software with a nice interface started from Kstars)
- Indi (the driver software used to control the devices; with EQmod for controlling the Skywatcher mount)
The way it goes is like this:
- Connect via RealVNC to the Astroberry OS
- Start Kstars
- Start Ekos from Kstars
- Indi launches automatically with Ekos
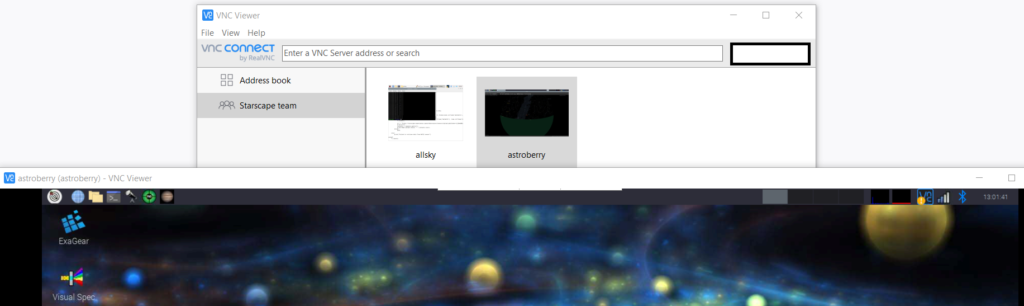
Connect to Astroberry via RealVNC
I found RealVNC to be the easiest way to connect to the device on a private network remotely. The home free subscription enables you to add up to 5 devices from a private network and up to 3 users. UPDATE: Starting June 2024 RealVNC removed the home plan and replaced it with the Lite plan where a single user you can set up to 3 devices. In my case, I already have 2 devices, one for the Astroberry and another for the all-sky camera and weather station. You need to create an account and then install it on your machine (laptop / PC) that you will use to remotely connect to Astroberry.
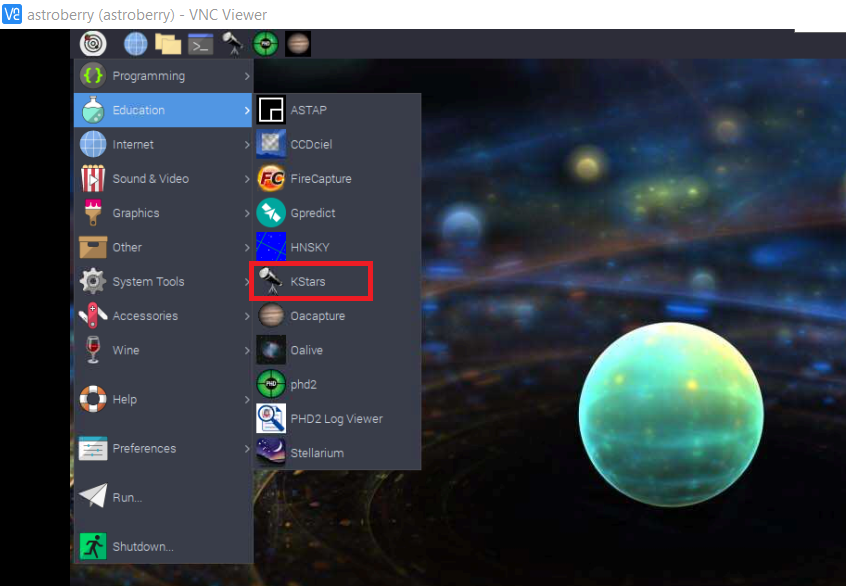
Starting KStars
KStars can be found in the main menu under Education.
UPDATE (18th January 2024): running sudo apt update && apt upgrade will update to Kstars 3.6.0 Stable which has a nicer interface and it does update Ekos and Indi as well. The images below are from the older version that ships with the Astroberry Server 2.0.5.
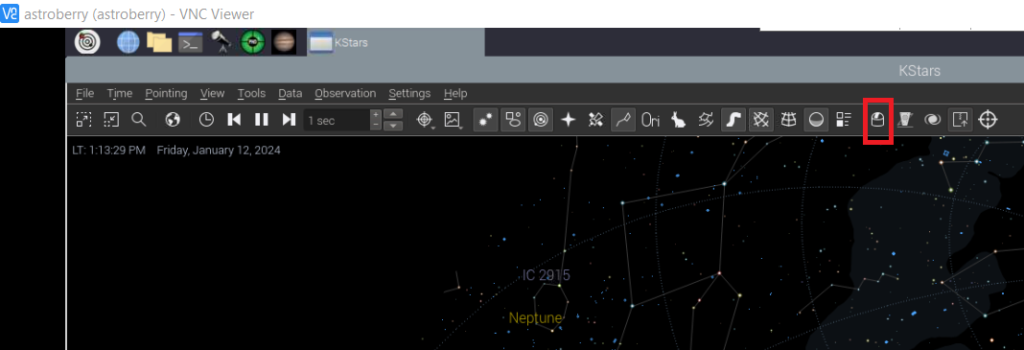
Once it opens (under the limited resources of the Pi4 it can take a few seconds so be patient) you need to start Ekos (the observatory icon from the toolbar).
The first step once Ekos is open is to create a profile for your observatory adding all devices plus 2 mandatory (one for the GPS dongle and another for Astrometry without which you will not be able to plate solve). If you do not have a GPS you can omit this but in my case, I have a DIYmalls VK-162 Remote Mount USB GPS Dongle to set my location and time.

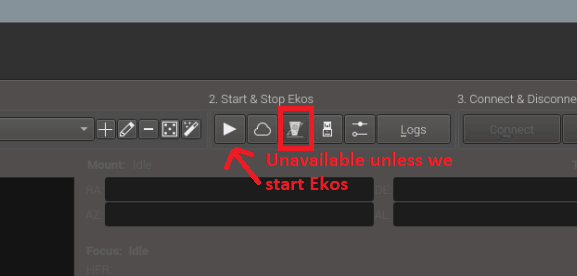
Once this is done we can start Ekos. It is important to remember that Indi is unavailable unless we start Ekos. After we click the Start button the Indi control panel automatically pops up and we will have the status of all our devices.
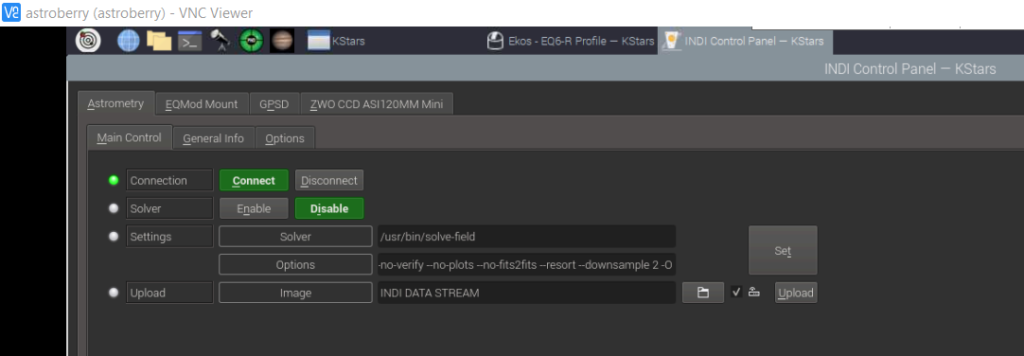
Above you can see the Indi config panel of the four devices we previously added to our profile. We can close and open it whenever we want. We also notice that in the Ekos interface, additional tabs have appeared.
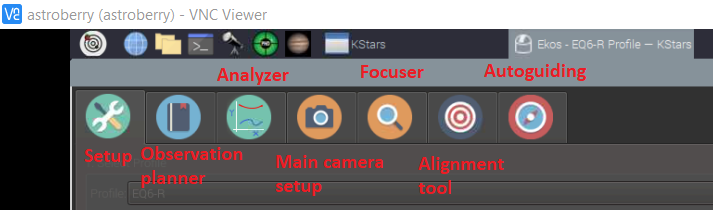
- Setup: this is where you have started from and where you create profiles, start Indi and connect to the devices
- Observation planner: this is the section where you decide what you will observe during the session
- Analyzer: here you check the overall performance of your setup in terms of various metrics
- Main camera setup: this tab allows you to set the camera and select where the images will be saved
- Focuser: this tab is for the autofocuser in case you have one
- Alignment: this tab is for performing the alignment at the start of your session
- Autoguiding: this tab is for setting up the autoguider during your long exposures.
The order of the approaching tabs
The order of the tabs is not necessarily the order of steps I usually take during a session. I normally start in the Setup tab, then proceed to the Alignment tab, then to the Autoguiding. Optionally, you can also go to the Focuser tab if you have an autofocuser after dealing with the Setup tab. Once these are done you go to the Main Camera Setup.
If you have a long night with many objects in mind you can use the Observation planner tab.
At this point, all is set to run the observation session. I intentionally skipped the details behind the processes in the Alignment tab as well as the procedure to park/unpark the telescope which are described in my Youtube tutorial.
You can also watch a recording of the process in my YouTube video below.
If you enjoyed this post consider following us on Facebook, Youtube, and Twitter or donating on Patreon. Also, stay tuned for public events Marc hosts regularly on Eventbrite.